Have you ever wondered how to host multiple websites on one server? It’s truly easier than you would possibly think! Essentially, hosting a couple of websites on one server means that you can have several files are saved on an identical laptop. This can save you time and money, as it removes the need to set up and manage separate servers for each website.
Now, you might be thinking that hosting a couple of websites on one server sounds complex and technical but it actually is not.
In this article, we’ll provide you with:
- Explanation about the benefits of hosting a couple of websites on one server,
- what you want to keep in mind earlier so that you do not waste your time and start over, and
- Provide clear and easy way and obviously step-by-step so that you just follow and make it by yourself.
Whether you are a beginner or a seasonal web developer, this blog will clear your confusion.
Why you will consider hosting multiple domains on one plan?
There are many reasons behind it. Imagine that you have 5 websites to be hosted and you are going to purchase 5 different hosting for it. You might be charged only 60-100 US Dollars right now for a year.
However, it will cost you fortune from the next year just because of the renewal cost of the hosting provider. For example, If it is 14 dollars per month for a hosting, it will cost you almost $1000 which can be a burden for you at some point. Hence, you will need to set-up all your domains on the same server in order to optimize the cost of it.
Will the performance of the website remains the same?
There will be no effect on the performance as long as you are with a reliable hosting partner who can provide you with the consistent, powerful and blazing fast hosting service.
We recommend our clients to purchase a shared hosting plan. The most important advantage for the shared hosting plan is that you will share the disk space and resources with other businesses who will use the same server with you hence why there will be no bound from the hosting side in term of resources.
You just need to make sure that the plan you will choose supports more than 1 websites or enough websites as per your needs.
What things to keep in mind before getting started?
Well, as we promised that you will not need to start over if you follow this tutorial from w3 solved, here is the checklists before you get started:
1. Check that you have enough disk space to host another domain.
Even if your server can handle more than 1 websites for you, you might not be able host your website for either disk is running out of space or inode limit (file usage limit from hosting) has reached to its peak.
2. Check your addon domain limit.
As mentioned earlier, you need to make sure that you can be able to host multiple websites on a single server before you are committed to a hosting provider. Moreover, You need to make sure that you have not used the most of your add-on domain limit.
How to host multiple websites on one server?
If you are sure that your server can handle your next website, you are clear to connect your domain/website to your hosting environment. Steps you need to follow exactly how it is stated in here-
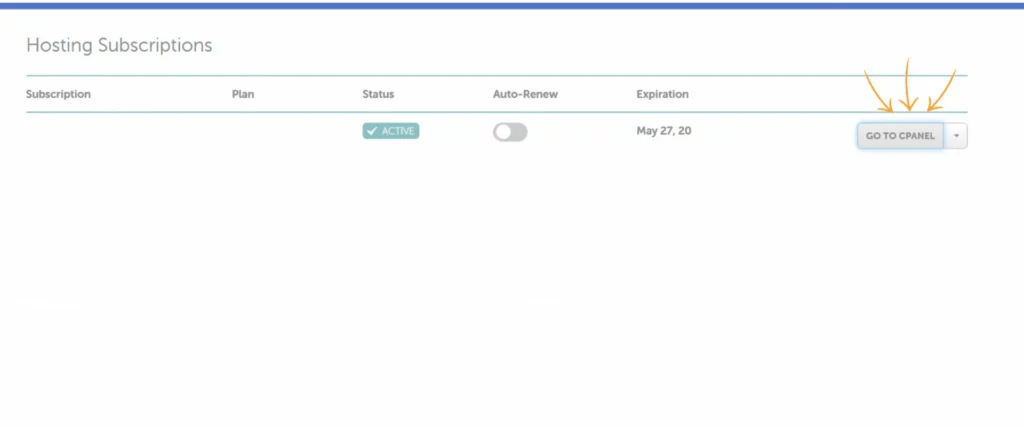
1. Login to your hosting Cpanel: Magic begins here! You will now login to your hosting Cpanel. Most of the time, you will be redirected to Cpanel.
Login to your hosting. Navigate to the Dashboard > hosting > locate Cpanel in there. If you click on it, you will be redirected to the Cpanel straight away.
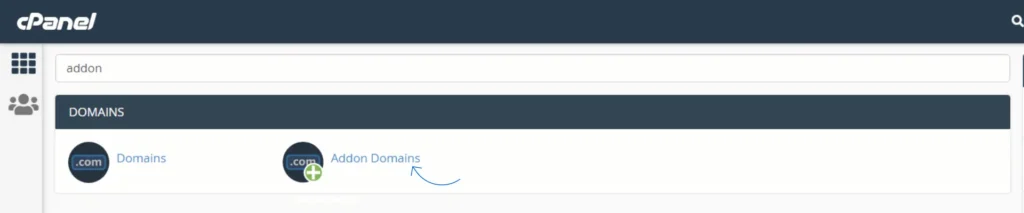
2. Locate Addon Domains: in the Cpanel, you will be able to find the Addon domains link under the Domain tab. You can also search it on the search bar at the top of the Cpanel and click on the Add-on domains.
3. Name the domain, sub-domain & document root: If you are in the Addon domains page of the Cpanel, there will be only 3 information to put in from you.
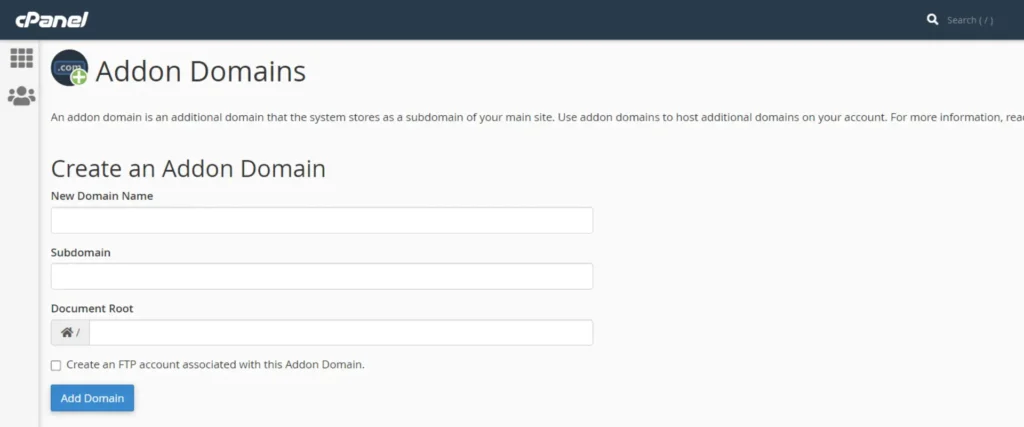
At first, You need to type your domain name that you wish to add in the server. If you write and proceed to the sub-domain field, you will see that rest others will be automatically filled.
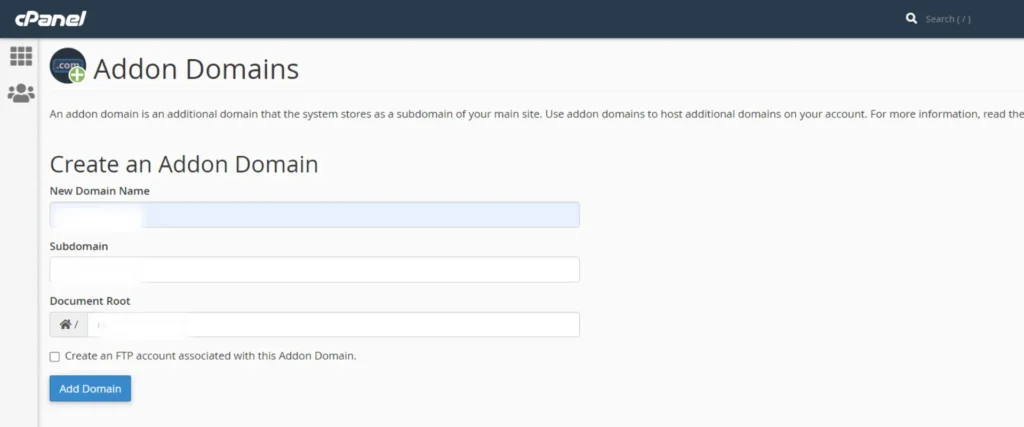
You can either change them as you want or keep these as it is. We recommend not to change anything and proceed to the next step.
4. It’s an optional step. You may skip it if you want.
In this step, you might ask if you will check on the “Create an FTP account associated with this Addon Domain” at the bottom of the above fields once you fill it.
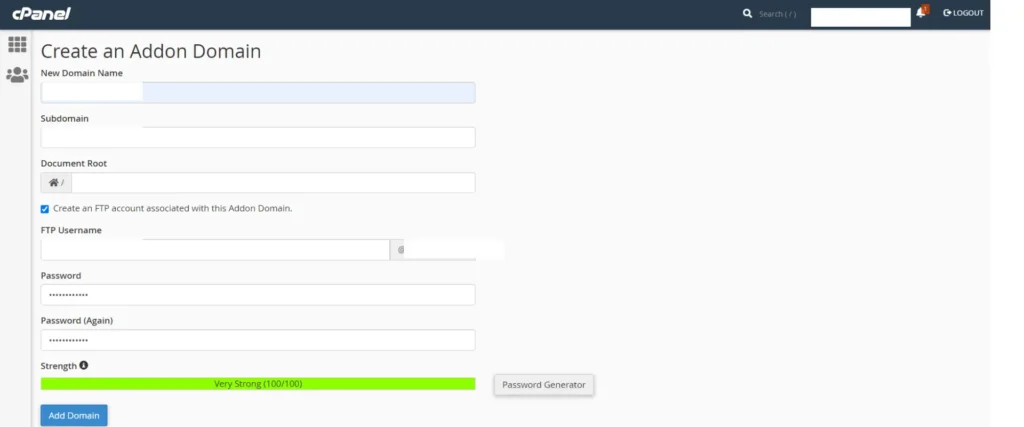
By ticking in it, you will make your files associated with the domain secure. Generally, when you are clicking on the option, this will create a file in the FTP account / file manager (you can locate it in Cpanel) for this domain and all your works, files and codes will be stored there.
Hence, it will be easier for you or the website maintenance agency that you will choose for your business needs to troubleshoot the website easily in the future.
You just need to add password and username to proceed with it. You do not have to tick it as it is not required in the Cpanel.
5. Connect domain to the hosting provider’s nameserver: Make sure that you are using correct name servers that is assigned from your hosting provider. Each provider has it’s own name-server. You can contact them in live chat and they will send you the information about it.

Once you have received the name-server, it’s time to connect it in your domain through dashboard. Make sure that you are in the dashboard of the domain NOT hosting.
Now, navigate to the domain > Manage >DNS > locate nameserver. In this tab, select custom DNS and just copy-paste the name-server that is given by the hosting support.
If you are done with it, it’s time to wait for an hour for the domain to connect with the hosting. It should not take more than 1 hour.
How to install WordPress?
So, you are now done with the addon domains setup in your server. If you want to install WordPress in this domain, you need to follow these steps-
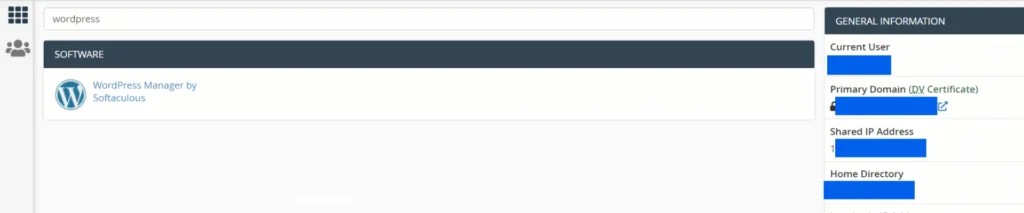
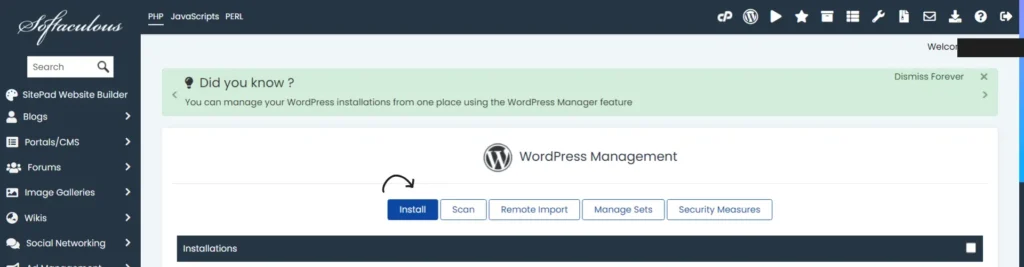
1. You need to either locate WordPress in the Cpanel or find it through the search feature at the top of the Cpanel.
2. Now, it’s easy to see the “Install” button there. You can click on it.
3. In the “Choose Installation URL” Section, You will need to choose the domain that you wish to install the WordPress CMS.
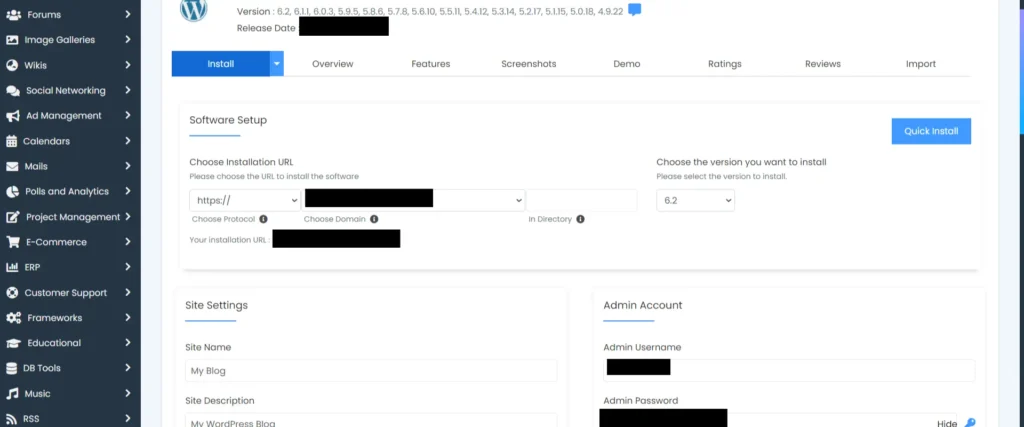
4. DO NOT type anything in the directory field. It should be empty. If you type anything in this field, the exact same text will be shown at the end of your live domain.
5. Now in the site settings, you will need to edit the “site title”, “site description”, “User Name”, ”Password” and most importantly ”Admin email”. The admin email should be the one that is active. You can change it later from the website dashboard.

6.At the bottom of the website, you may now click on the “Install” button and you are ready to go.
So easy right?
We hope that you found this blog helpful to launch your next website. We are so excited to see what are you thinking on this.
If you are facing any issue regarding on the hosting of multiple websites, you can comment below. We will be more than happy to answer all the questions you may have.